细品 Spring Boot+Thymeleaf,还有这么多好玩的细节!
[TOC]
虽然现在流行前后端分离,但是后端模版在一些关键地方还是非常有用的,例如邮件模版、代码模版等。当然也不排除一些古老的项目后端依然使用动态模版。
Thymeleaf 简洁漂亮、容易理解,并且完美支持 HTML5,可以直接打开静态页面,同时不新增标签,只需增强属性,这样也降低了学习成本。
因此松哥今天花点时间和大家仔细分享一下 Thymeleaf。
1. Thymeleaf 简介
Thymeleaf 是新一代 Java 模板引擎,它类似于 Velocity、FreeMarker 等传统 Java 模板引擎,但是与传统 Java 模板引擎不同的是,Thymeleaf 支持 HTML 原型。
它既可以让前端工程师在浏览器中直接打开查看样式,也可以让后端工程师结合真实数据查看显示效果,同时,SpringBoot 提供了 Thymeleaf 自动化配置解决方案,因此在 SpringBoot 中使用 Thymeleaf 非常方便。
事实上, Thymeleaf 除了展示基本的 HTML ,进行页面渲染之外,也可以作为一个 HTML 片段进行渲染,例如我们在做邮件发送时,可以使用 Thymeleaf 作为邮件发送模板。
另外,由于 Thymeleaf 模板后缀为 .html,可以直接被浏览器打开,因此,预览时非常方便。
2. 整合 Spring Boot
2.1 基本用法
Spring Boot 中整合 Thymeleaf 非常容易,只需要创建项目时添加 Thymeleaf 即可:
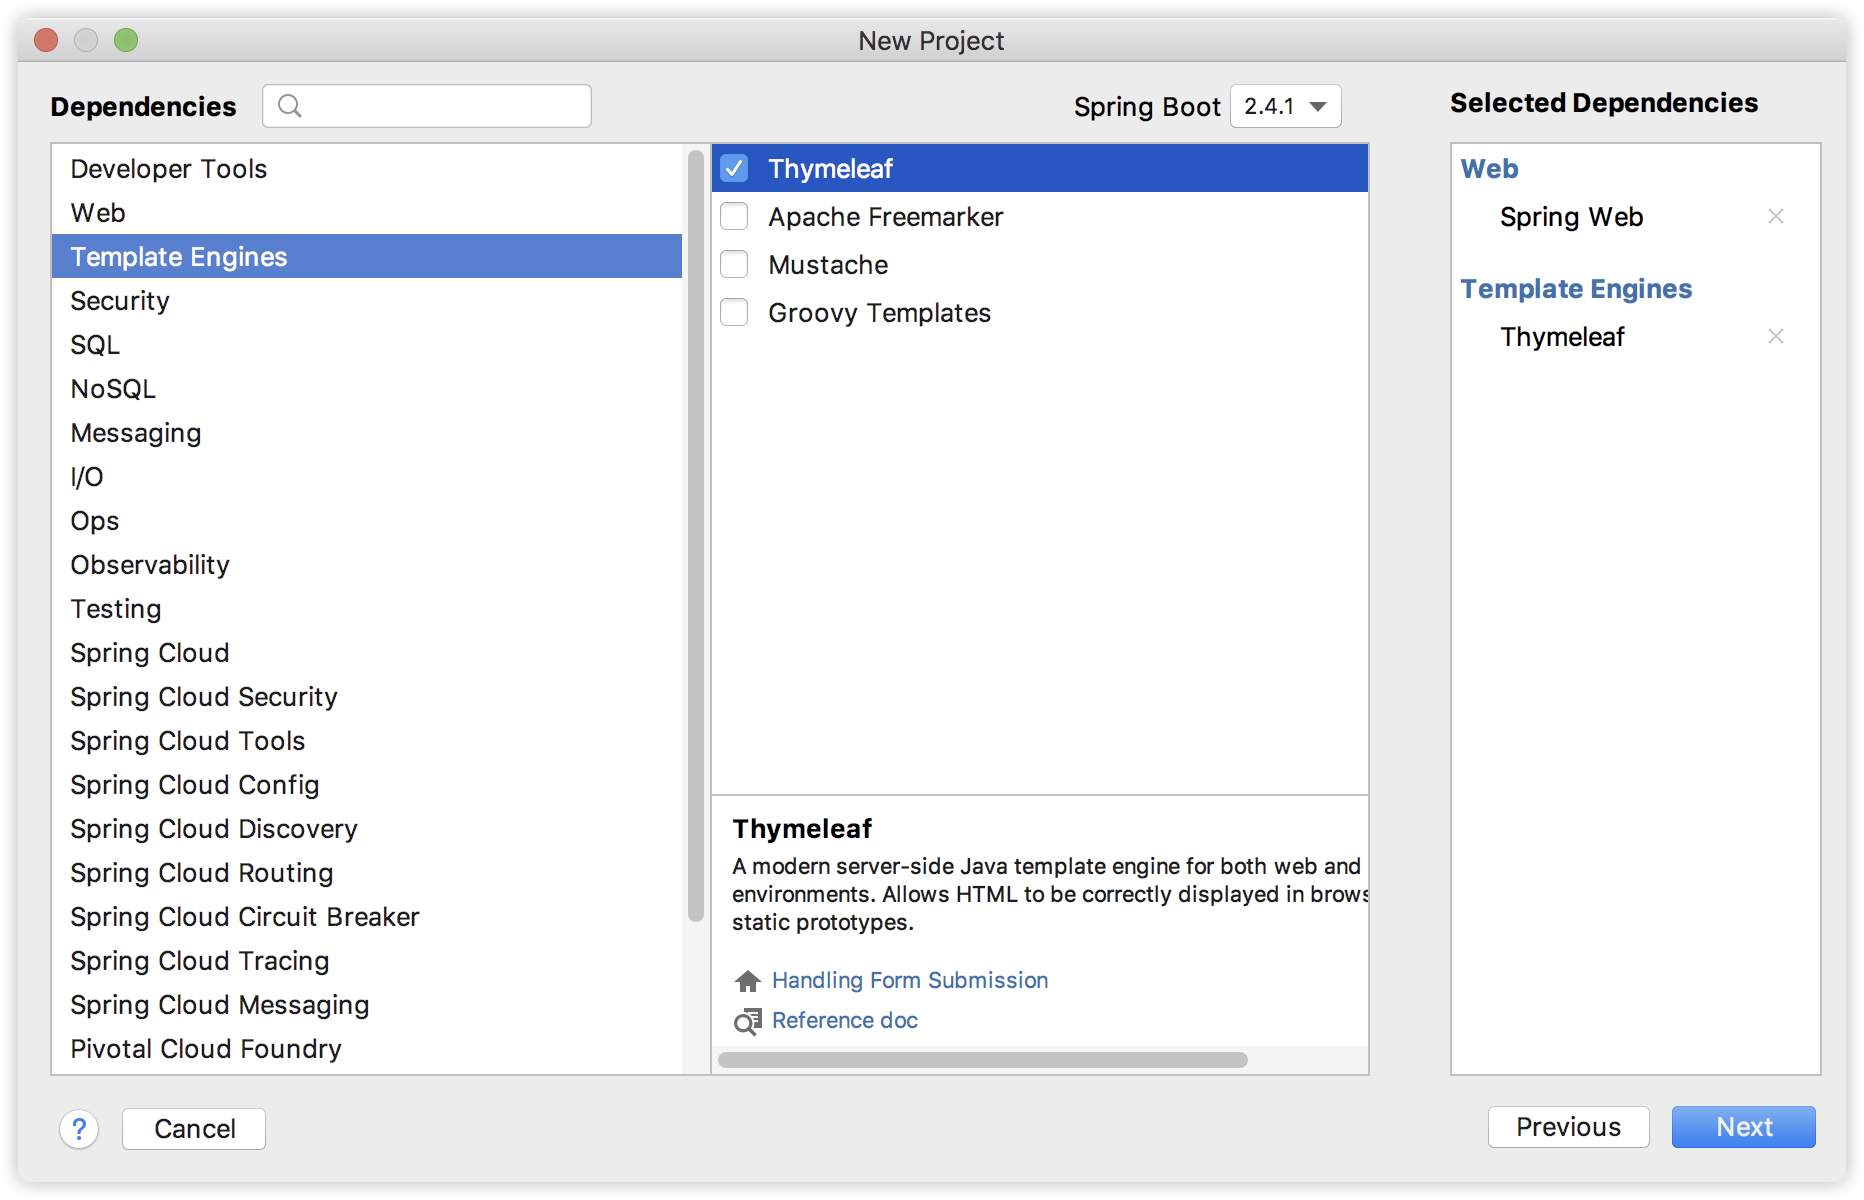
创建完成后,pom.xml 依赖如下:
1 | <dependency> |
当然,Thymeleaf 不仅仅能在 Spring Boot 中使用,也可以使用在其他地方,只不过 Spring Boot 针对 Thymeleaf 提供了一整套的自动化配置方案,这一套配置类的属性在 org.springframework.boot.autoconfigure.thymeleaf.ThymeleafProperties 中,部分源码如下:
1 |
|
- 首先通过
@ConfigurationProperties注解,将application.properties前缀为spring.thymeleaf的配置和这个类中的属性绑定。 - 前三个
static变量定义了默认的编码格式、视图解析器的前缀、后缀等。 - 从前三行配置中,可以看出来,
Thymeleaf模板的默认位置在resources/templates目录下,默认的后缀是html。 - 这些配置,如果开发者不自己提供,则使用 默认的,如果自己提供,则在
application.properties中以spring.thymeleaf开始相关的配置。
而我们刚刚提到的,Spring Boot 为 Thymeleaf 提供的自动化配置类,则是 org.springframework.boot.autoconfigure.thymeleaf.ThymeleafAutoConfiguration ,部分源码如下:
1 |
|
可以看到,在这个自动化配置类中,首先导入 ThymeleafProperties ,然后 @ConditionalOnClass 注解表示当当前系统中存在 TemplateMode 和 SpringTemplateEngine 类时,当前的自动化配置类才会生效,即只要项目中引入了 Thymeleaf 相关的依赖,这个配置就会生效。
这些默认的配置我们几乎不需要做任何更改就可以直接使用了。如果开发者有特殊需求,则可以在 application.properties 中配置以 spring.thymeleaf 开头的属性即可。
接下来我们就可以创建 Controller 了,实际上引入 Thymeleaf 依赖之后,我们可以不做任何配置。新建的 IndexController 如下:
1 |
|
在 IndexController 中返回逻辑视图名+数据,逻辑视图名为 index ,意思我们需要在 resources/templates 目录下提供一个名为 index.html 的 Thymeleaf 模板文件。
- 创建 Thymeleaf
1 |
|
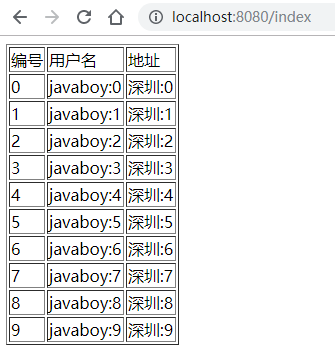
在 Thymeleaf 中,通过 th:each 指令来遍历一个集合,数据的展示通过 th:text 指令来实现,
注意 index.html 最上面引入 thymeleaf 名称空间(最新版并无强制要求)。
配置完成后,就可以启动项目了,访问 /index 接口,就能看到集合中的数据了:
2.2 手动渲染
前面我们说的是返回一个 Thymeleaf 模板,我们也可以手动渲染 Thymeleaf 模板,这个一般在邮件发送时候有用,例如我在 resources/templates 目录下新建一个邮件模板,如下:
1 |
|
这一个 HTML 模板中,有几个变量,我们要将这个 HTML 模板渲染成一个 String 字符串,再把这个字符串通过邮件发送出去,那么如何手动渲染呢?
1 |
|
- 渲染时,我们需要首先注入一个 TemplateEngine 对象,这个对象就是在 Thymeleaf 的自动化配置类中配置的(即当我们引入 Thymeleaf 的依赖之后,这个实例就有了)。
- 然后构造一个 Context 对象用来存放变量。
- 调用 process 方法进行渲染,该方法的返回值就是渲染后的 HTML 字符串,然后我们将这个字符串发送出去。
3. Thymeleaf 细节
前面两个案例让小伙伴们大致上理解了在 Spring Boot 中要如何使用 Thymeleaf,接下来,松哥将详细介绍 Thymeleaf 本身的一些具体用法。
3.1 标准表达式语法
3.1.1 简单表达式
${...}
直接使用 th:xx = "${}" 获取对象属性。这个在前面的案例中已经演示过了,不再赘述。
*{...}
可以像 ${...} 一样使用,也可以通过 th:object 获取对象,然后使用 th:xx = "*{}" 获取对象属性,这种简写风格极为清爽,推荐大家在实际项目中使用。
1 | <table border="1" th:object="${user}"> |
#{...}
通常的国际化属性:#{...} 用于获取国际化语言翻译值。
在 resources 目录下新建两个文件:messages.properties 和 messages_zh_CN.properties,内容如下:
messages.properties:
1 | message = javaboy |
messages_zh_CN.properties:
1 | message = 江南一点雨 |
然后在 thymeleaf 中引用 message,系统会根据浏览器的语言环境显示不同的值:
1 | <div th:text="#{message}"></div> |
@{...}
- 引用绝对 URL:
1 | <script type="text/javascript" th:src="@{http://localhost:8080/hello.js}"></script> |
等价于:
1 | <script type="text/javascript" src="http://localhost:8080/hello.js"></script> |
- 上下文相关的 URL:
首先在 application.properties 中配置 Spring Boot 的上下文,以便于测试:
1 | server.servlet.context-path=/myapp |
引用路径:
1 | <script type="text/javascript" th:src="@{/hello.js}"></script> |
等价于:
1 | <script type="text/javascript" src="/myapp/hello.js"></script> |
- 相对 URL:
这个相对是指相对于服务器的 URL,例如如下引用:
1 | <script type="text/javascript" th:src="@{~/hello.js}"></script> |
等价于:
1 | <script type="text/javascript" src="/hello.js"></script> |
应用程序的上下文 /myapp 将被忽略。
- 协议相对 URL:
1 | <script type="text/javascript" th:src="@{//localhost:8080/hello.js}"></script> |
等价于:
1 | <script type="text/javascript" src="//localhost:8080/hello.js"></script> |
- 带参数的 URL:
1 | <script type="text/javascript" th:src="@{//localhost:8080/hello.js(name='javaboy',age=99)}"></script> |
等价于:
1 | <script type="text/javascript" th:src="//localhost:8080/hello.js?name=javaboy&age=99"></script> |
~{...}
片段表达式是 Thymeleaf 的特色之一,细粒度可以达到标签级别,这是 JSP 无法做到的。片段表达式拥有三种语法:
~{ viewName }:表示引入完整页面~{ viewName ::selector}:表示在指定页面寻找片段,其中 selector 可为片段名、jquery选择器等~{ ::selector}: 表示在当前页寻找
举个简单例子。
在 resources/templates 目录下新建 my_fragment.html 文件,内容如下:
1 | <div th:fragment="javaboy_link"><a href="http://www.javaboy.org">www.javaboy</a></div> |
这里有两个 div,通过 th:fragment 来定义片段,两个 div 分别具有不同的名字。
然后在另外一个页面中引用该片段:
1 | <table border="1" th:object="${user}" th:fragment="aaa"> |
通过 th:replace 来引用片段。第一个表示引用完整的 my_fragment.html 页面;第二个表示引用 my_fragment.html 中的名为 javaboy_link 的片段;第三个表示引用当前页面名为 aaa 的片段,也就是上面那个 table。
3.1.2 字面量
这些是一些可以直接写在表达式中的字符,主要有如下几种:
- 文本字面量: ‘one text’, ‘Another one!’,…
- 数字字面量: 0, 34, 3.0, 12.3,…
- 布尔字面量: true, false
- Null字面量: null
- 字面量标记:one, sometext, main,…
案例:
1 | <div th:text="'这是 文本字面量(有空格)'"></div> |
如果文本是英文,并且不包含空格、逗号等字符,可以不用加单引号。
3.1.3 文本运算
文本可以使用 + 进行拼接。
1 | <div th:text="'hello '+'javaboy'"></div> |
如果字符串中包含变量,也可以使用另一种简单的方式,叫做字面量置换,用 | 代替 '...' + '...',如下:
1 | <div th:text="|hello ${user.username}|"></div> |
3.1.4 算术运算
算术运算有:+, -, *, / 和 %。
1 | <div th:with="age=(99*99/99+99-1)"> |
th:with 定义了一个局部变量 age,在其所在的 div 中可以使用该局部变量。
3.1.5 布尔运算
- 二元运算符:and, or
- 布尔非(一元运算符):!, not
案例:
1 | <div th:with="age=(99*99/99+99-1)"> |
3.1.6 比较和相等
表达式里的值可以使用 >, <, >= 和 <= 符号比较。== 和 != 运算符用于检查相等(或者不相等)。注意 XML规定 < 和 > 标签不能用于属性值,所以应当把它们转义为 < 和 >。
如果不想转义,也可以使用别名:gt (>);lt (<);ge (>=);le (<=);not (!)。还有 eq (==), neq/ne (!=)。
举例:
1 | <div th:with="age=(99*99/99+99-1)"> |
3.1.7 条件运算符
类似于我们 Java 中的三目运算符。
1 | <div th:with="age=(99*99/99+99-1)"> |
其中,: 后面的部分可以省略,如果省略了,又同时计算结果为 false 时,将返回 null。
3.1.8 内置对象
基本内置对象:
- #ctx:上下文对象。
- #vars: 上下文变量。
- #locale:上下文区域设置。
- #request:(仅在 Web 上下文中)HttpServletRequest 对象。
- #response:(仅在 Web 上下文中)HttpServletResponse 对象。
- #session:(仅在 Web 上下文中)HttpSession 对象。
- #servletContext:(仅在 Web 上下文中)ServletContext 对象。
在页面可以访问到上面这些内置对象,举个简单例子:
1 | <div th:text='${#session.getAttribute("name")}'></div> |
实用内置对象:
- #execInfo:有关正在处理的模板的信息。
- #messages:在变量表达式中获取外部化消息的方法,与使用#{…}语法获得的方式相同。
- #uris:转义URL / URI部分的方法
- #conversions:执行配置的转换服务(如果有)的方法。
- #dates:java.util.Date对象的方法:格式化,组件提取等
- #calendars:类似于#dates但是java.util.Calendar对象。
- #numbers:用于格式化数字对象的方法。
- #strings:String对象的方法:contains,startsWith,prepending / appending等
- #objects:一般对象的方法。
- #bools:布尔评估的方法。
- #arrays:数组方法。
- #lists:列表的方法。
- #sets:集合的方法。
- #maps:地图方法。
- #aggregates:在数组或集合上创建聚合的方法。
- #ids:处理可能重复的id属性的方法(例如,作为迭代的结果)。
这是一些内置对象以及工具方法,使用方式也都比较容易,如果使用的是 IntelliJ IDEA,都会自动提示对象中的方法,很方便。
举例:
1 | <div th:text="${#execInfo.getProcessedTemplateName()}"></div> |
3.2 设置属性值
这个是给 HTML 元素设置属性值。可以一次设置多个,多个之间用 , 分隔开。
例如:
1 | <img th:attr="src=@{/1.png},title=${user.username},alt=${user.username}"> |
会被渲染成:
1 | <img src="/myapp/1.png" title="javaboy" alt="javaboy"> |
当然这种设置方法不太美观,可读性也不好。Thymeleaf 还支持在每一个原生的 HTML 属性前加上 th: 前缀的方式来使用动态值,像下面这样:
1 | <img th:src="@{/1.png}" th:alt="${user.username}" th:title="${user.username}"> |
这种写法看起来更清晰一些,渲染效果和前面一致。
上面案例中的 alt 和 title 则是两个特殊的属性,可以一次性设置,像下面这样:
1 | <img th:src="@{/1.png}" th:alt-title="${user.username}"> |
这个等价于前文的设置。
3.3 遍历
数组/集合/Map/Enumeration/Iterator 等的遍历也算是一个非常常见的需求,Thymeleaf 中通过 th:each 来实现遍历,像下面这样:
1 | <table border="1"> |
users 是要遍历的集合/数组,u 则是集合中的单个元素。
遍历的时候,我们可能需要获取遍历的状态,Thymeleaf 也对此提供了支持:
- index:当前的遍历索引,从0开始。
- count:当前的遍历索引,从1开始。
- size:被遍历变量里的元素数量。
- current:每次遍历的遍历变量。
- even/odd:当前的遍历是偶数次还是奇数次。
- first:当前是否为首次遍历。
- last:当前是否为最后一次遍历。
u 后面的 state 表示遍历状态,通过遍历状态可以引用上面的属性。
1 | <table border="1"> |
3.4 分支语句
只显示奇数次的遍历,可以使用 th:if,如下:
1 | <table border="1"> |
th:if 不仅仅只接受布尔值,也接受其他类型的值,例如如下值都会判定为 true:
- 如果值是布尔值,并且为 true。
- 如果值是数字,并且不为 0。
- 如果值是字符,并且不为 0。
- 如果值是字符串,并且不为 “false”, “off” 或者 “no”。
- 如果值不是布尔值,数字,字符或者字符串。
但是如果值为 null,th:if 会求值为 false。
th:unless 的判定条件则与 th:if 完全相反。
1 | <table border="1"> |
这个显示效果则与上面的完全相反。
当可能性比较多的时候,也可以使用 switch:
1 | <table border="1"> |
th:case="*" 则表示默认选项。
3.5 本地变量
这个我们前面已经涉及到了,使用 th:with 可以定义一个本地变量。
3.6 内联
我们可以使用属性将数据放入页面模版中,但是很多时候,内联的方式看起来更加直观一些,像下面这样:
1 | <div>hello [[${user.username}]]</div> |
用内联的方式去做拼接也显得更加自然。
[[...]] 对应于 th:text (结果会是转义的 HTML),[(...)]对应于 th:utext,它不会执行任何的 HTML 转义。
像下面这样:
1 | <div th:with="str='hello <strong>javaboy</strong>'"> |
最终的显示效果如下:

不过内联方式有一个问题。我们使用 Thymeleaf 的一大优势在于不用动态渲染就可以直接在浏览器中看到显示效果,当我们使用属性配置的时候确实是这样,但是如果我们使用内联的方式,各种表达式就会直接展示在静态网页中。
也可以在 js 或者 css 中使用内联,以 js 为例,使用方式如下:
1 | <script th:inline="javascript"> |
js 中需要通过 th:inline="javascript" 开启内联。
4. 小结
好啦,Thymeleaf 跟大家也介绍的差不多了,应付日常的工作应该是可以了。对 Thymeleaf 感兴趣的小伙伴,也可以看看它的官方文档: https://www.thymeleaf.org。